The way your document looks can be as important as what it says. Adding a background to Google Docs can improve its appearance and make it stand out. It’s a simple way to enhance readability or add a professional touch. Let’s break down what a background is, how it works in Google Docs, and how it compares to watermarks.
Table of Contents
What Is a Background in Google Docs?
A background is the visual layer behind your document’s text or content. It can make the document easier to read or give it a personal or professional feel.
A watermark, by contrast, is a faint design or text—like a logo or brand name—placed behind the content. Both backgrounds and watermarks sit behind the main text, but their purpose differs. Backgrounds set the tone or style of a document, while watermarks are more about branding or adding authenticity.
Step-by-Step Guide: Inserting a Background Image in Google Docs
1. Access Your Google Docs Project
- Log in to your Google account.
- Navigate to Google Drive.
- Open the desired Google Docs project you wish to modify.
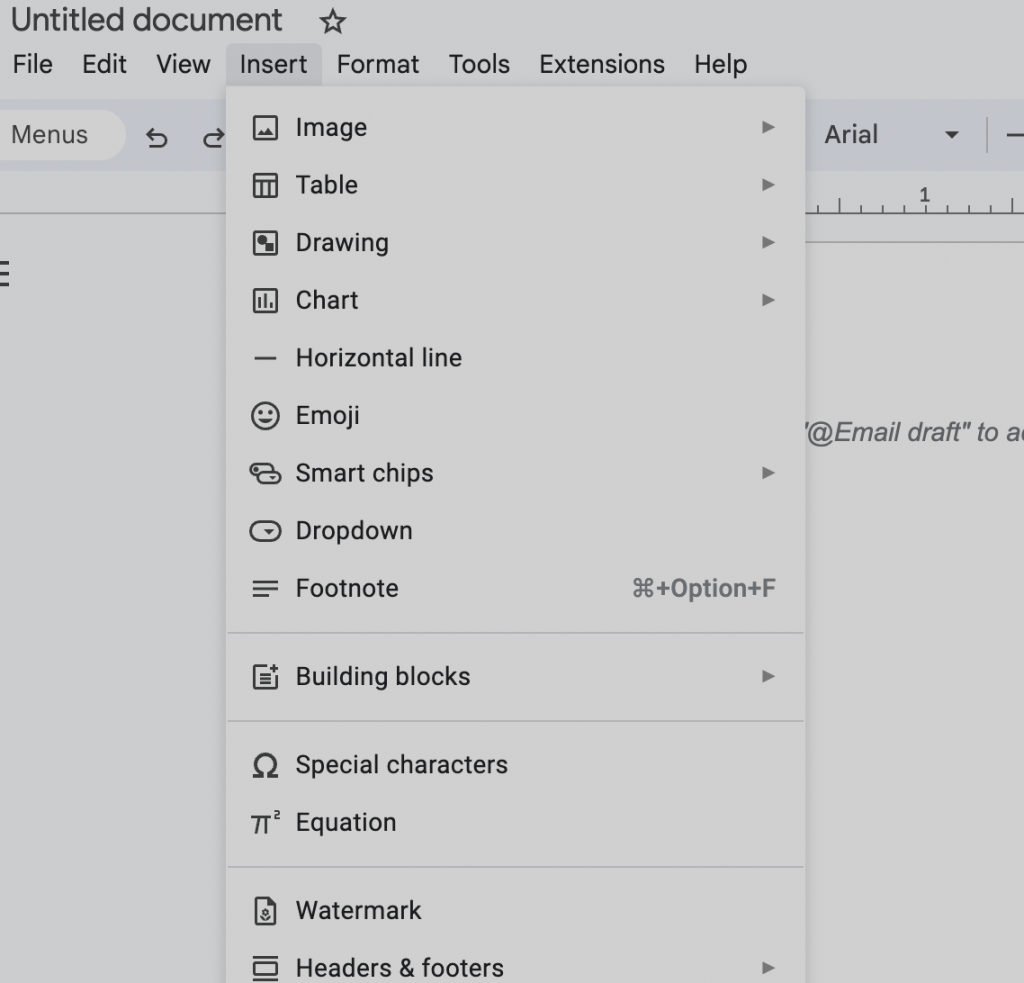
2. Navigating to the ‘Insert’ Option

- Once inside your document, look for the top menu bar.
- Click on the “Insert” tab to reveal a dropdown menu.
3. Choosing Your Image: The ‘Watermark’ Option

- From the dropdown options, select “Watermark”.
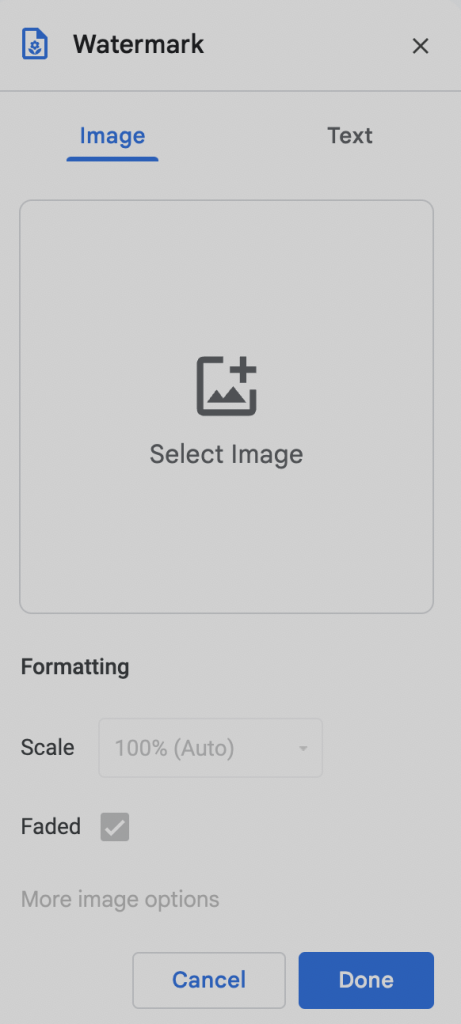
- A right pane will appear on your screen. Within this pane, click on “Select Image”.
- A window will pop up, prompting you to browse your computer.
- Select the desired image you want to add as a background in Google Docs and confirm your choice.
4. Perfecting the Look: Resizing and Fading Options
- Once the image is inserted, navigate to the “Scale” area in the right pane to adjust the image size to fit the document.
- Decide if you want the image to have a faded appearance. If so, check the box labeled “faded”. If not, leave it unchecked. This ensures the background complements the content without overpowering it.
Customizing Further: Advanced Background Options
Color Play: Changing the Background Color of a Single Page
To add a splash of color to your document, Google Docs offers the option to change the background color of individual pages. To achieve this:
- Click on the “File” option in the top menu.
- Navigate to “Page Setup”.
- A dialog box will appear, allowing you to choose and apply your desired color to the page.
Beyond Images: Using Patterns and Gradients
While adding a background in Google Docs, you’re not limited to just solid colors or images. The platform also provides:
- A variety of pattern options to give your document a textured look.
- Gradient backgrounds that transition between two or more colors, adding depth and dynamism to your content.
FAQs
How can I change the background color of a single page in a Google Doc?
To change the background color of a single page, navigate to “File”, then “Page Setup”, and select your preferred color from the dialog box that appears.
How to put an image behind text in Google Docs?
To place an image behind text, use the “Watermark” feature under the “Insert” tab. This allows the image to sit behind your content, making it visible yet not overpowering the text.
Is there a difference between a watermark and a background in Google Docs?
Yes, while both are placed behind the main content, a background aims to enhance or set a mood for the document. In contrast, a watermark, often faint in appearance, serves as a branding tool or mark of authenticity.
Google Docs provides plenty of ways to customize your documents. Adding backgrounds can make your content more engaging and visually appealing. Experimenting with different designs helps your document stand out.

