
If your Mac is running slow, glitchy, or you’re planning to sell or trade it in, a factory reset is the best way to start fresh. This guide will walk you through how to reset macOS Sequoia step by step. If you’re using an older version like Ventura, Monterey, or Big Sur, don’t worry—I’ll call out the differences so you don’t run into issues.
Table of Contents
Preparing for a Factory Reset
A factory reset completely erases your Mac, wiping all files, applications, and system settings. This process restores macOS to a clean state, making it feel like a brand-new computer. Additionally, macOS removes your Apple ID from the device, preventing unauthorized access to your personal data.
Before jumping into the reset, take a few minutes to prepare so you don’t lose important data or run into activation issues later. If you run into issues, do not hesitate to contact Apple Support.
Back Up Your Data
Since a reset erases everything, backing up your files ensures you can restore important documents, apps, and settings later. Choose one of these methods:
Recommended Backup Methods
| Backup Method | Pros | Cons |
|---|---|---|
| Time Machine (Best for Full Backups) | Backs up everything (files, apps, settings), easy restoration | Requires external hard drive |
| iCloud Drive | Automatic syncing for documents and photos | Limited free storage (5GB), paid plans needed for large backups |
| External Hard Drive | Full control over files, one-time cost | Requires manual backup |
| Google Drive / Dropbox | Easy to access from any device | Needs internet access, limited free storage |
If you want to restore your Mac exactly as it was before the reset, Time Machine is the best option.
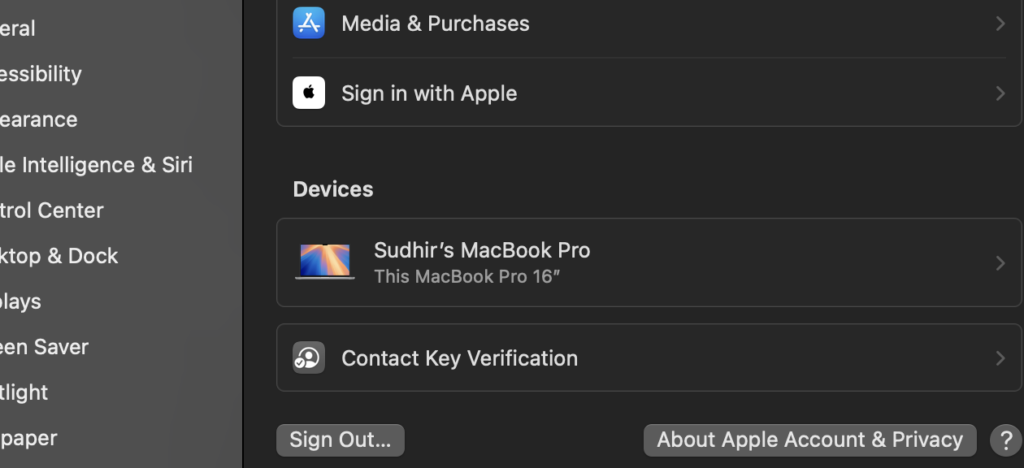
Sign Out of Your Apple Account
To prevent Activation Lock issues, make sure to sign out of iCloud, iMessage, and iTunes before resetting your Mac.
1. Sign Out of iCloud:
- Go to System Settings > Apple Account > Sign Out (on macOS Sequoia/Ventura).
- On macOS Monterey or earlier, go to System Preferences > Apple ID > Sign Out.
See my screenshots below:
2. Sign Out of iMessage:
- Open the Messages app.
- Go to Settings > iMessage and click Sign Out.

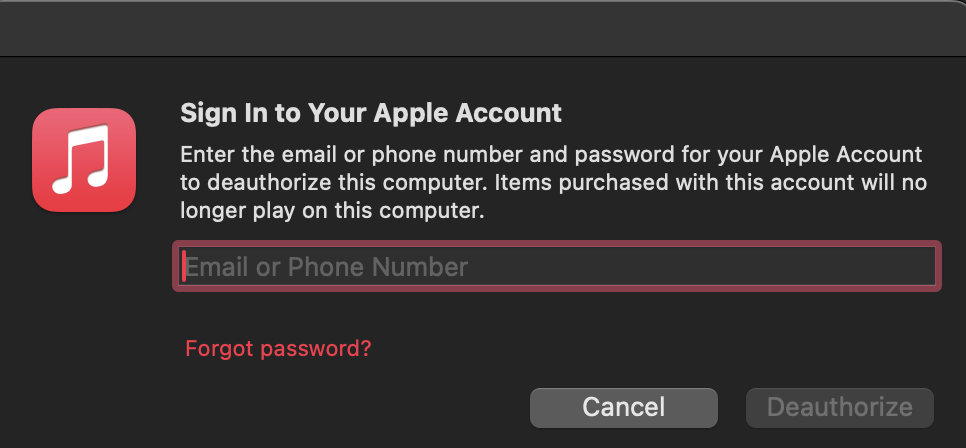
3. Deauthorize Apple Music/iTunes:
- Open the Music app.
- Click Account > Authorizations > Deauthorize This Computer.
4. Turn Off “Find My Mac”
- In System Settings > Apple Account, toggle off Find My Mac.
5. Sign Out of Other Accounts (if needed)
If you’re using Dropbox, OneDrive, Google Drive, or other cloud services, log out to prevent sync conflicts after reinstalling macOS.
Once everything is backed up and signed out, you’re ready to reset! 🚀
Factory Reset macOS Sequoia (2024) & Ventura (2022)
If your Mac runs macOS Sequoia or Ventura, Apple introduced the Erase Assistant, making resets much easier.
How to Use Erase Assistant (Fastest Method)
- Go to System Settings > General > Transfer or Reset.
- Click Erase All Content and Settings.
- Enter your admin password and confirm.
- Your Mac will erase everything and restart automatically.
💡 This method automatically removes your Apple ID and disables Activation Lock, making it ideal if you’re selling or trading in your Mac.
The Erase Assistant feature is NOT available on macOS Monterey or Big Sur. Instead, you’ll need to use Recovery Mode (explained below).
Table 1: Factory Reset Methods for Different macOS Versions
| macOS Version | Reset Method | Recovery Mode Shortcut | Notes |
|---|---|---|---|
| Sequoia (2024) | Erase Assistant | Not needed | Found in System Settings > General > Transfer or Reset |
| Ventura (2022) | Erase Assistant | Not needed | Similar to Sequoia, easier than older versions |
| Monterey (2021) | Recovery Mode + Disk Utility | Command (⌘) + R | No built-in reset tool, must erase manually |
| Big Sur (2020) | Recovery Mode + Disk Utility | Command (⌘) + R | Uses traditional macOS reset process |
Factory Reset Older Macs (macOS Monterey & Big Sur)
If you’re using macOS Monterey (2021) or Big Sur (2020), you’ll need to manually erase your Mac using Recovery Mode.
How to Use macOS Recovery Mode
- Restart your Mac and immediately hold Command (⌘) + R until the Apple logo appears.
- Select Disk Utility from the macOS Utilities window.
- Choose your startup disk (Macintosh HD) and click Erase.
- Select:
- APFS (for SSDs)
- Mac OS Extended (Journaled) (for HDDs)
- GUID Partition Map (Scheme)
- Click Erase and close Disk Utility.
Reinstall macOS After Reset
Follow the on-screen instructions to reinstall macOS.
- Back in macOS Utilities, select Reinstall macOS and click Continue.
- Follow the on-screen instructions to reinstall macOS.
⚠️ If Reinstallation Fails:
- Try Internet Recovery: Restart and hold Option + Command + R keyboard shortcut to reinstall the latest compatible macOS.
- Use a bootable macOS installer if Wi-Fi issues prevent downloading macOS.
Reset macOS Using Terminal (For Advanced Users)
For users comfortable with the command line, macOS can be erased and reinstalled entirely through Terminal. This method is useful when Recovery Mode isn’t accessible, when a faster reset is needed, or when dealing with startup issues that prevent normal operation.
Step 1: Boot into macOS Recovery and Open Terminal
If the Mac is functional, restart it and immediately press and hold Command + R to enter macOS Recovery Mode. Once the macOS Utilities window appears, click on Utilities in the menu bar and select Terminal.
If the system is completely unbootable and standard Recovery Mode doesn’t work, restart and use Internet Recovery Mode by holding down Option + Command + R until a spinning globe appears. This method downloads the latest compatible macOS version directly from Apple’s servers.
Step 2: Identify the Startup Disk
Before erasing macOS, confirm which disk is the main startup drive. In Terminal, enter:
diskutil listThis command will display all connected disks and partitions. Look for the disk labeled as Apple_APFS or Apple_HFS, usually named Macintosh HD. The corresponding identifier will be something like disk0 or disk1.
Step 3: Erase the Startup Disk
Once the disk identifier is confirmed, erase it using the following command:
diskutil eraseDisk APFS "Macintosh HD" disk0If the Mac has an older hard drive instead of an SSD, Mac OS Extended (Journaled) should be used instead of APFS:
diskutil eraseDisk HFS+J "Macintosh HD" disk0If an error occurs stating the disk is in use, try unmounting it first with:
diskutil unmountDisk disk0Then attempt to erase it again.
Step 4: Download the macOS Installer
The full macOS installer needs to be downloaded before reinstallation. To check available versions, enter:
softwareupdate --list-full-installersTo download a specific macOS version, replace the version number in the following command:
softwareupdate --fetch-full-installer --full-installer-version 14.0This will download macOS Sequoia. To verify the installer is downloaded, list the Applications directory:
ls /Applications/Install*If the installer is not listed, ensure there is enough free disk space and that the internet connection is stable. If the fetch command fails, manually download the installer from Apple’s website.
Step 5: Reinstall macOS
Once the installer is available, macOS can be reinstalled with the following command:
sudo /Applications/Install\ macOS\ Sequoia.app/Contents/Resources/startosinstall --eraseinstall --newvolumename "Macintosh HD"This command will erase the disk again and immediately begin the macOS installation. If no user interaction is desired, the --nointeraction flag can be added.
For older macOS versions like Monterey or Big Sur, replace Install\ macOS\ Sequoia.app with the correct installer name.
Step 6: Reset NVRAM and SMC (If Needed)
If the Mac has been experiencing startup issues, power failures, or boot loops, resetting the NVRAM and SMC may resolve them.
To reset NVRAM, run:
sudo nvram -cTo reset the SMC on Intel Macs, shut down the computer, hold Shift + Control + Option + Power for ten seconds, then release all keys and turn it back on.
For Apple Silicon Macs, the SMC resets automatically when the device is restarted.
Step 7: Complete macOS Setup
Once macOS is reinstalled, follow the Setup Assistant to configure Wi-Fi, sign in with an Apple ID, and restore data if a backup was made. If the Mac is being sold or given away, do not sign in and instead power it off, allowing the new owner to complete the setup.
Setting Up Your Mac After a Reset
Once your Mac restarts after the reset, follow these steps:
For Personal Use (Reinstall Everything)
- Set up Wi-Fi and sign in with your Apple ID.
- Restore from Time Machine or iCloud if needed.
- Download essential apps from the App Store.
If Selling or Giving Away
- DO NOT sign in with your Apple ID.
- Let the new owner complete the setup.
Troubleshooting Common Reset Issues
Even if you follow the steps correctly, some issues can arise.
Mac Won’t Enter Recovery Mode
✅ Fix: Try Internet Recovery Mode (⌥ + ⌘ + R) or use a bootable USB installer.
Reinstall macOS Fails
✅ Fix:
- Open Terminal in Recovery Mode and enter:bashCopyEdit
ntpdate -u time.apple.comThis syncs the date/time and resolves installation errors.
Activation Lock Won’t Go Away
✅ Fix:
- Ensure iCloud & Find My Mac are turned off before resetting.
Time Machine Backup Won’t Restore
✅ Fix:
- Use Migration Assistant to manually transfer files.
| Common Issue | Cause | Solution |
|---|---|---|
| Mac won’t boot into Recovery Mode | Keyboard issue or outdated macOS | Try Internet Recovery (⌥ + ⌘ + R) |
| Reinstall macOS fails | Date/time mismatch | Use Terminal: ntpdate -u time.apple.com |
| Activation Lock won’t go away | iCloud still linked | Sign out of iCloud & Find My Mac before resetting |
| Erase button in Disk Utility is grayed out | Startup disk is active | Click View > Show All Devices, then erase the entire drive |
FAQs
Can I reset my Mac if it doesn’t have macOS Monterey or later?
Yes, you can reset your Mac even if it’s running an older version of macOS. The process involves manually erasing your hard drive via Disk Utility in Recovery Mode and then reinstalling the operating system available for your Mac.
What should I do if I forgot my administrator password?
If you’ve forgotten your administrator password, you can reset it in Recovery Mode. Restart your Mac and enter Recovery Mode, then use the Terminal to reset the password or choose the ‘Forgot all passwords’ option to reset using your Apple ID.
How do I ensure all my personal information is completely erased?
To ensure all your personal information is completely erased, use Disk Utility in Recovery Mode to erase your hard drive. Choose the ‘APFS (Encrypted)’ format for SSDs or ‘Mac OS Extended (Journaled, Encrypted)’ for HDDs to securely wipe your data.
Can I perform a factory reset without an Apple ID?
Performing a factory reset without an Apple ID is possible, but you’ll need to skip signing in with an Apple ID during the reinstallation process of macOS. However, ensure you’ve signed out of all Apple services before the reset to avoid activation locks.
What are the risks of factory resetting my Mac?
The primary risk of factory resetting your Mac is data loss. Ensure you have a complete backup of your data before proceeding. Additionally, if not done correctly, you may encounter issues reinstalling macOS, leading to temporary unavailability of your Mac.
Will factory resetting my Mac fix performance issues?
Yes! If your Mac has been running slow, a reset can improve speed by clearing out old system junk.
Final Thoughts
Resetting macOS Sequoia, Ventura, Monterey, or Big Sur doesn’t have to be complicated. If you’re on Sequoia or Ventura, use the Erase Assistant for the fastest reset. If you’re on Monterey or Big Sur, you’ll need Recovery Mode to erase your Mac manually.
If this guide helped you, share it with someone who needs a fresh start on their Mac! 🚀