
If you’re seeing the “Wi-Fi does not have an IP address” error on your MacBook, it means your device isn’t able to connect to the internet. This can be incredibly frustrating, especially if you rely on your Mac for work, school, or streaming. The good news? There are a few simple steps you can take to get your MacBook’s Wi-Fi back up and running.
Below, we’ll walk you through some Mac troubleshooting methods to resolve this issue. Follow these steps one by one, and you should have your connection working again in no time.
Don’t have time to read the entire article? We put together this troubleshooting summary:
Troubleshooting Summary
If you’re seeing the “Wi-Fi does not have an IP address” error on your MacBook, it means your device isn’t getting an IP address from the router, preventing internet access. Try these quick fixes:
- Restart your Mac & router
- Renew DHCP lease
- Forget and re-add the Wi-Fi network
- Create a new network location
- Check VPN/security software
If none of these work, move to advanced troubleshooting, including resetting network settings, checking for macOS updates, or resetting your router.
Table of Contents
Restart Your Devices
Before diving into complex fixes, let’s start with the basics: a simple restart.
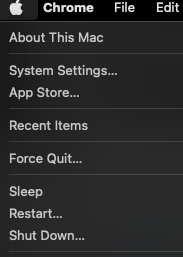
- Restart Your MacBook: Click the Apple logo in the top-left corner of your screen, then select Restart. (See screenshot)
- Restart Your Router: Power off your router, wait for about 30 seconds, and then turn it back on.
- Forget and Reconnect to Wi-Fi: Sometimes, your Mac just needs a fresh connection. Click the Wi-Fi icon in the menu bar, turn it off, wait a few seconds, and turn it back on.
If your Wi-Fi still doesn’t have an IP address, move on to the next step.
Renew DHCP Lease
Every time you connect to a Wi-Fi network, your MacBook requests an IP address from the router using DHCP (Dynamic Host Configuration Protocol). If something goes wrong with that request, you won’t get an IP address, which results in no internet access. Renewing the DHCP lease forces your Mac to request a new IP address.
Here’s how to do it:
- Click the Apple logo and go to System Preferences (or System Settings in macOS Ventura and later).
- Select Network and choose Wi-Fi from the left panel.
- Click Advanced in the bottom-right corner.
- Go to the TCP/IP tab.
- Click Renew DHCP Lease and press OK.
Once you’ve done this, check if your MacBook is now connected to the internet.
Note: If you’re using an older MacBook with a Broadcom Wi-Fi chip, you might experience frequent connection drops or failure to obtain an IP address. Some users report that updating macOS or manually setting DNS servers can help resolve these hardware-specific issues.
Remove and Re-add the Wi-Fi Network
If renewing the DHCP lease didn’t work, you might need to remove and reconnect to your Wi-Fi network. This will clear out any saved settings that might be interfering with the connection.
Steps to Forget and Reconnect to Wi-Fi:
- Open System Preferences and go to Network.
- Select Wi-Fi, then click Advanced.
- Under Preferred Networks, find your Wi-Fi network and click the minus (-) button to remove it.
- Click OK, then Apply to save the changes.
- Now, reconnect to the network by selecting it from the Wi-Fi menu and entering your password.
If the error persists, try the next solution.
Create a New Network Location
If your MacBook’s Wi-Fi is still not getting an IP address, creating a new network location can reset your network settings and give your Mac a fresh start.
How to Create a New Network Location:
- Open System Preferences (or System Settings on newer macOS versions) and go to Network.
- Click the Location dropdown at the top and select Edit Locations.
- Click the plus (+) button to create a new location (e.g., “New Location”).
- Click Done, then select your newly created location.
- Reconnect to your Wi-Fi network and check if the internet is working.
The Locations setting is a bit hard to find, see my screenshot below to see where it is.
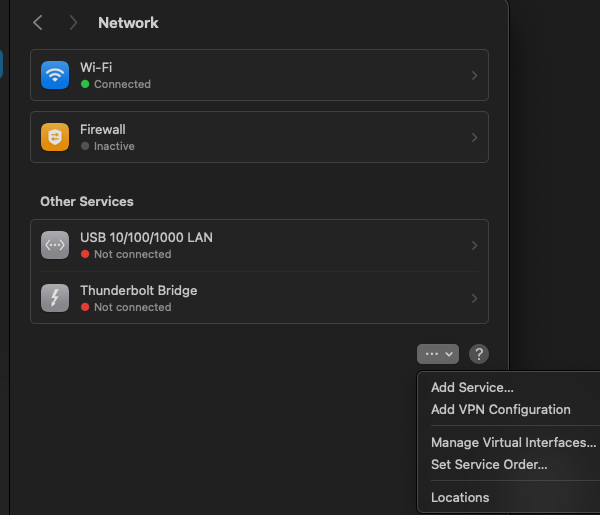
Creating a new location resets how your Mac communicates with Wi-Fi networks, often solving IP address issues.
Check Security Software or VPNs
If you use a VPN, firewall, or security software, it may be interfering with your Wi-Fi connection by blocking network access.
Here’s what you can do:
- Turn off your VPN temporarily and see if the Wi-Fi starts working.
- Disable any third-party firewall or security software to check if it’s causing the issue.
- If your connection works after disabling security software, adjust its settings or check for updates.
Sometimes, overly aggressive security settings can prevent your Mac from getting an IP address. If you find that’s the case, consult the software’s support page for guidance on adjusting its network permissions.
Update macOS
A software bug or outdated network settings might be causing the issue. Updating macOS ensures that you have the latest network configurations and bug fixes.
How to Check for macOS Updates:
- Click the Apple logo in the top-left corner.
- Select System Preferences (or System Settings).
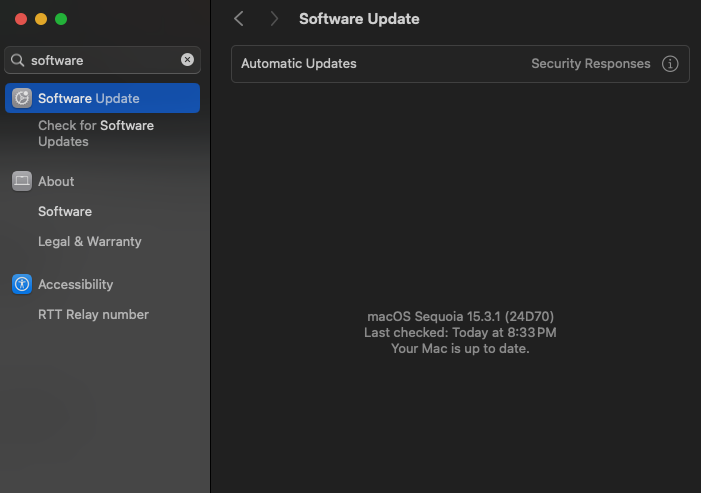
- Click Software Update and check for any available updates.
- If an update is available, install it and restart your Mac.
Here is a screenshot below of the Software update screen on my MacBook Pro M3 Max.
After the update, check if your Wi-Fi is working properly.
If you’ve tried all of these steps and your Mac still isn’t connecting, there could be a hardware issue with your Wi-Fi adapter or router.
Signs Your Wi-Fi Hardware Might Be Failing:
- No Wi-Fi networks detected at all.
- Wi-Fi disconnects frequently, even after all troubleshooting steps.
- Other devices connect fine, but your Mac doesn’t.
If you are still having issues, consider resetting your router to factory settings or contacting Apple Support for further assistance or proceed to our Advanced troubleshooting steps in the next section.
Advanced Troubleshooting Steps
If you’ve tried everything and your MacBook still says “Wi-Fi does not have an IP address,” here are a few advanced troubleshooting steps:
Reset Network Settings
If misconfigured network settings are causing the problem, resetting them might help.
- Open System Preferences > Network.
- Select Wi-Fi, then click the minus (-) button to remove it.
- Click the plus (+) button and re-add Wi-Fi as a network service.
- Click Apply and reconnect to your Wi-Fi network.
Reset Your Router to Factory Settings
If multiple devices are struggling to connect, your router may be the issue. Resetting it to factory settings can clear any IP-related errors.
- Locate the reset button on your router.
- Hold it down for about 10-30 seconds (refer to your router’s manual for exact instructions).
- Allow the router to reboot and set it up again.
If the issue persists after resetting the router, try testing your Wi-Fi with a different device. If all devices have trouble, your ISP might be having issues, and you should reach out to them.
When to Contact Apple Support
If none of the above solutions work, there may be a hardware issue with your MacBook’s Wi-Fi adapter. In this case, it’s best to:
- Visit an Apple Store or an authorized repair center.
- Contact Apple Support for troubleshooting guidance.
- Try using an Ethernet adapter, like this one from TP-Link, to see if a wired connection works (if it does, the issue is likely with your Wi-Fi hardware).
FAQs
What causes the “Wi-Fi does not have an IP address” error on Mac?
This error means your MacBook is unable to get an IP address from the router, preventing internet access. It could be due to network settings, router issues, or security software interference.
How do I fix my MacBook not getting an IP address?
Try restarting your Mac and router, renewing the DHCP lease, forgetting and re-adding the network, or creating a new network location. If that doesn’t work, check security software and update macOS.
Can a VPN cause Wi-Fi issues on my Mac?
Yes, VPNs can interfere with network connections by altering IP settings. Try disconnecting the VPN and see if your internet works. If so, adjust the VPN settings or switch servers.
What if my Mac still won’t connect after trying everything?
If the problem persists, reset your network settings, try a different Wi-Fi network, or test with an Ethernet adapter. If nothing works, your Wi-Fi hardware might need repair, so contact Apple Support.
Does resetting the router help with this issue?
Yes, if multiple devices are struggling to connect, resetting your router to factory settings can resolve IP-related problems. Make sure to back up any important router configurations before resetting.
How do I know if my router is the problem?
If other devices also fail to connect or show similar IP errors, your router or internet provider may be the issue. Try connecting to another Wi-Fi network to confirm.
Will updating macOS fix Wi-Fi problems?
Sometimes, yes. macOS updates include bug fixes and network improvements that may resolve IP-related errors. Always keep your Mac updated for better performance and security.
Final Thoughts
Seeing the “Wi-Fi does not have an IP address” error on your MacBook is frustrating, but in most cases, the issue can be fixed with a few simple troubleshooting steps. Restarting your devices, renewing the DHCP lease, re-adding your Wi-Fi network, and checking security software are often enough to get your internet working again.
If you’re still facing Wi-Fi issues on your Mac, such as frequent disconnections, we have a helpful article with additional fixes.
If you’ve gone through all these steps and still have no connection, it might be time to reset your router or reach out to Apple Support for additional help.
Hopefully, this guide helped you fix the problem and get back online! If you found this useful, feel free to share it with others who might be struggling with Mac Wi-Fi issues.